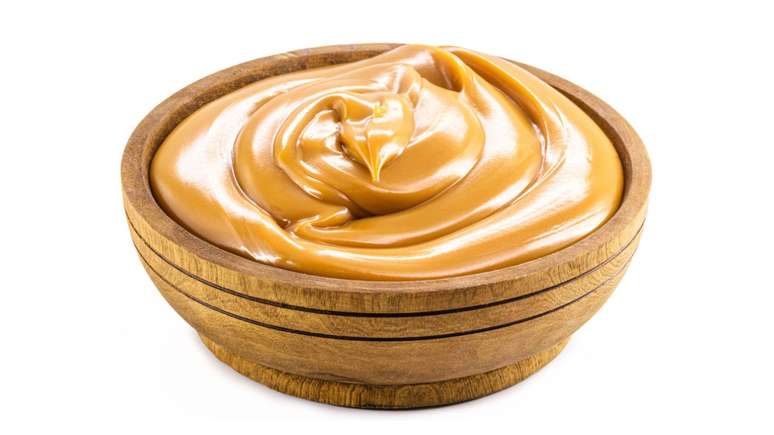
Dulce de leche is the Minas Gerais delicacy that has won the hearts of all Brazilians. In addition to being delicious, it goes well with cheeses, in cake fillings and in desserts that also recall grandma’s recipes… Huuum, it’s already made your mouth water!
But if you’ve ever thought about doing it Homemade dulce de leche and you’ve given up for fear of cooking the can in the pressure cooker, know that you’re not alone. Many people are afraid of using this utensil, so with this in mind, the Kitchen Guide has put together 3 tips that will save you money when it comes to preparing your desserts safely.
But here’s a tip: avoid using canned condensed milk to make dulce de leche at home! This because cook the box or putting it in the oven can be harmful to your healthEverything OK?
1- Cooking condensed milk
First you need to remove the label from the can and then place it upright on a baking tray. Then add enough water to cover the jar but not fill the pan, okay? This way, when it starts to boil, there is no risk of the water boiling over.
Depending on the size of the pan, you can place multiple cans at the same time and optimize the production of sweets by producing them in large quantities.
For dulce de leche to work, leave the water on high heat until it starts to boil, after it starts to boil, let it boil on low heat for 2 to 3 hours!
The length of time you leave the pan on the heat will determine the color and consistency of your dulce de leche. If you want it lighter and softer, remove it from the heat once it has reached two hours. If you prefer it thicker and darker then leave it longer.
After the dulce de leche has reached the desired time and consistency, remove the can from the pan with tongs. This stops the cooking process.
Wait for the can to cool completely before using your dulce de leche, this is because the hot contents are under pressure inside the can and if you open it while it is still hot, it could spill and burn you!
If the dulce de leche will not be used at the moment, after cooling it can be stored for up to 3 months, inside the jar and at room temperature.
2- You also have the option of preparing dulce de leche in the oven
In this process there is no problem using condensed milk from the can, as the contents will be removed from the can or box and transferred to a container that can be placed in the oven. Distribute the condensed milk well until it covers the entire bottom of the pan.
As with the previous procedure, you can also use more than one can or box of condensed milk to prepare your dulce de leche, just be careful not to overfill the pan.
Now just cover the baking dish or refractory with aluminum foil and place it inside another baking dish. Ideally, this pot should be larger than the other, enough so that there is no space between them and also a little higher, so that the water that will be added does not overflow.
Add water until it reaches ¾ of the height of the smaller mold and place in a preheated oven at 180°C, in a bain-marie, for about 1 hour.
After this period in the oven you will have a light and more consistent dulce de leche, if you want it softer and darker just put it back in the oven but this time without the film, so you can see its color and consistency.
Once you have reached the desired colour, remove the dulce de leche from the oven and mix with a spoon to dissolve any lumps that may have formed.
Mix well until a homogeneous mixture with a consistent consistency and a caramelized color is formed. If you don’t want to use the dulce de leche immediately, transfer it to a glass container and store it in the refrigerator. Can be used within 3 weeks!
3- Have you run out of condensed milk? Use whole milk
For this process you will only need two ingredients:
- 1 liter of whole milk (or coconut milk for vegans)
- 1 cup of sugar.
In a pan, add the liter of milk with the sugar and mix, combining the two over medium heat. Let the milk boil for about 2 hours. Once the sugar has completely dissolved, let the mixture cook, stirring constantly, this helps the milk reduce and also prevents it from burning.
The mixture changes color and goes from white to caramel and once again what will determine the color and consistency of your candy will be how long it stays warm.
If you prefer a lighter dulce de leche, leave it on the heat for about 90 minutes, while if you prefer it darker, leave it to cook for a couple of hours. Once you reach the desired consistency, remove the dulce de leche from the heat and let it cool.
During this process it is normal for the dulce de leche to become lumpy, so for those who want to consume it like this there is no problem. But those who prefer a softer dessert can sieve it or even blend it in the blender. None of this changes the end result and your dulce de leche will be delicious!
If you don’t consume it immediately, it will last up to 3 weeks in the refrigerator, if stored correctly and well covered!
Did you like our advice? So share it with that person who is terrified of pressure cookers and show them that it is possible to make delicious dulce de leche without any problems!
And do you want any more advice? Find out how to prepare condensed milk at home! YES! And it’s also a quick and super practical preparation. Watch it in the video:
Source: Terra
Ben Stock is a lifestyle journalist and author at Gossipify. He writes about topics such as health, wellness, travel, food and home decor. He provides practical advice and inspiration to improve well-being, keeps readers up to date with latest lifestyle news and trends, known for his engaging writing style, in-depth analysis and unique perspectives.


