Having trouble finding your relationship between the different features offered by the platforms? AlloCiné offers a twice-weekly tutorial dedicated to streaming platforms to help you out. With Disney+, we’ve helped you set up parental controls and how to turn off autoplay episodes to limit screen time for little ones (and seniors, too).
Watching movies (Traquée), series (Loki, Ahsoka, etc.) or other programs on streaming platforms like Disney+ means being able to watch the works in their original version. It’s the best way to learn about cultures from around the world. However, not everyone is multilingual and therefore not everyone can do without subtitles.
Watching American, Spanish, Italian, Polish, Israeli series or movies with original subtitles can quickly become limiting if the subtitle display is not properly adjusted. It is also possible to choose to place French subtitles on French productions if you have hearing difficulties. In any case, it is essential to have well-adapted subtitles to enjoy the best viewing experience.
Step 1: On the home page
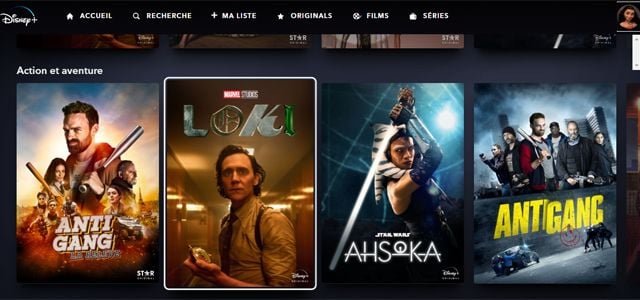
Start by identifying yourself on Disney+ and once on your profile home page, select your program.
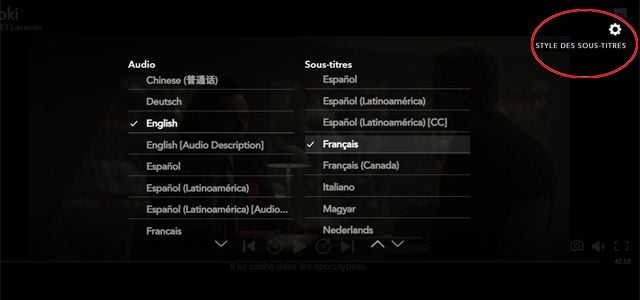
Step 2: Click on Settings
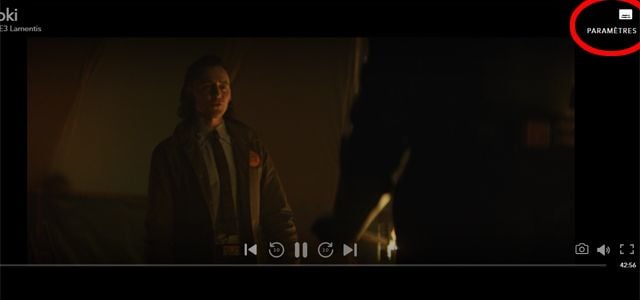
After launching your program, point your mouse at the small “Audio” icon in the upper right corner of the video player, you will see the word “Settings” displayed. Click on it.
Step 3: Choose your language
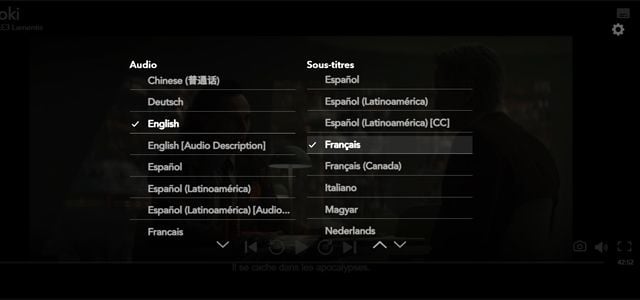
A whole series of options are available to you. You just have to choose the language in which you want to listen to your program, but also – and this is what we’re interested in here – you can choose the language in which you want to read the subtitles.
Step 4: Change the subtitle style
Now change the subtitle style by clicking on the cogwheel in the top right corner of this menu. This will allow you to get additional options.
Step 5: Customize your subtitles

Many customization options are available to you. Now you can choose the subtitle font style from eight different options. You can choose the font color and transparency – very practical when you’re worried about white subtitles on movies or TV shows with too much calibration. and its size from a choice of six sizes.
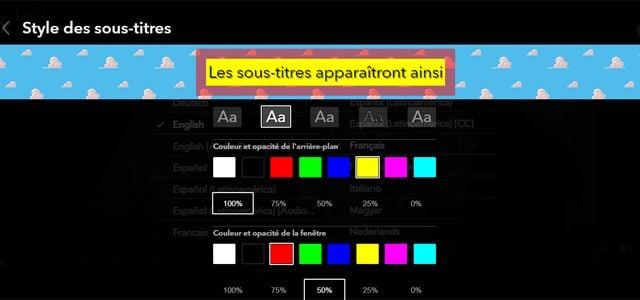
The customization possibilities continue with five options for choosing the font outline. This will allow subtitles to stand out according to your needs, for example with a small outline shadow. For a better view of the subtitles, you can display them in the background. It is up to you to choose its transparency and color. The same options for choosing the transparency and color of the window that will appear in the background.
You can test different combinations to find the one that works best and make sure you don’t hurt your eyes.
Step 6: Close Settings
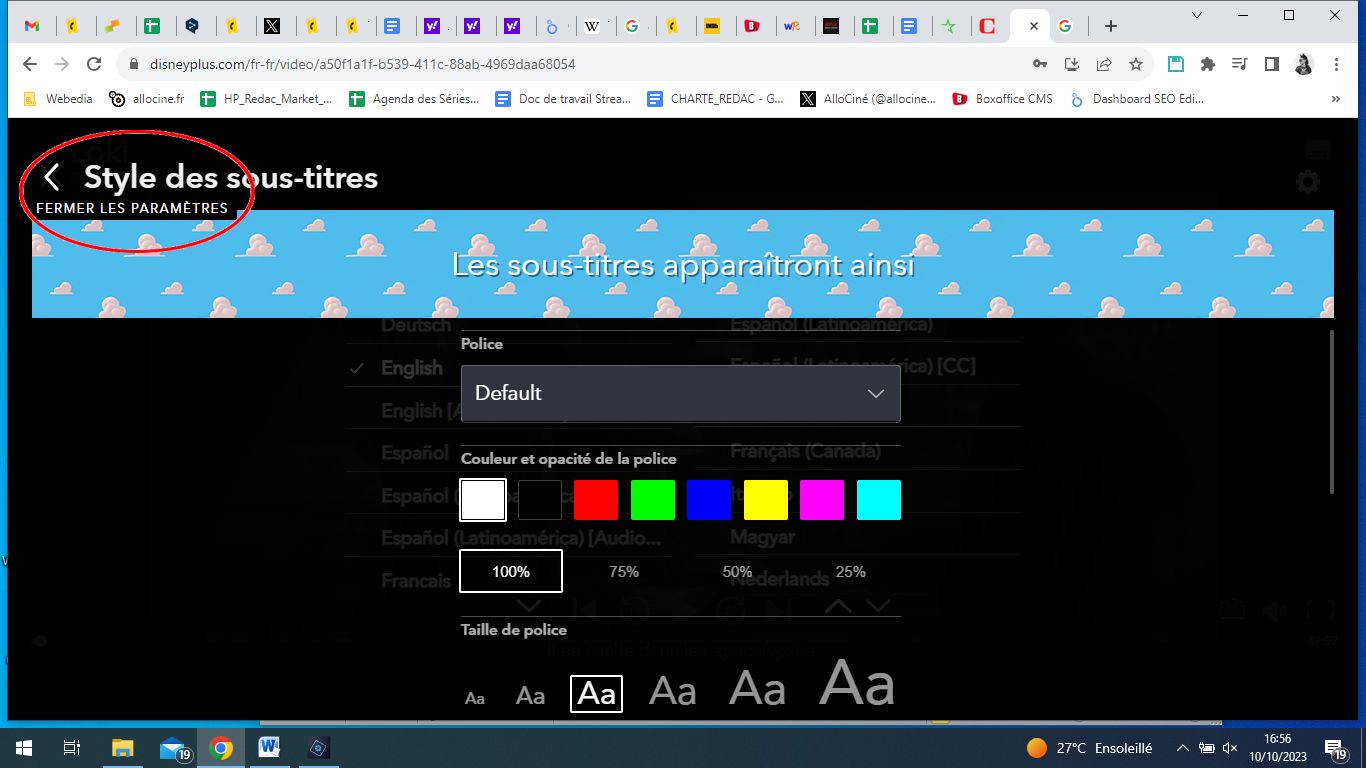
Now that your selection is made, all you have to do is leave the page. To do this, hover your mouse over “Subtitle Styles” at the top left of your screen and click the small left-pointing arrow when “Close Options” appears. All you have to do is restart your program and enjoy your new subtitle setting.
Source: Allocine
Camila Luna is a writer at Gossipify, where she covers the latest movies and television series. With a passion for all things entertainment, Camila brings her unique perspective to her writing and offers readers an inside look at the industry. Camila is a graduate from the University of California, Los Angeles (UCLA) with a degree in English and is also a avid movie watcher.
![Everything starts here in advance: Laetitia finally returned … which awaits you from the week of 2025 to July 18, 2025 [SPOILERS]](https://fr.web.img6.acsta.net/img/10/fd/10fd5c34a7423d6ce6792d21bf31947a.jpg "Everything starts here in advance: Laetitia finally returned … which awaits you from the week of 2025 to July 18, 2025 [SPOILERS]")


