Do it yourself: how to install wainscoting on the walls

Do it yourself: how to install wainscoting on the walls


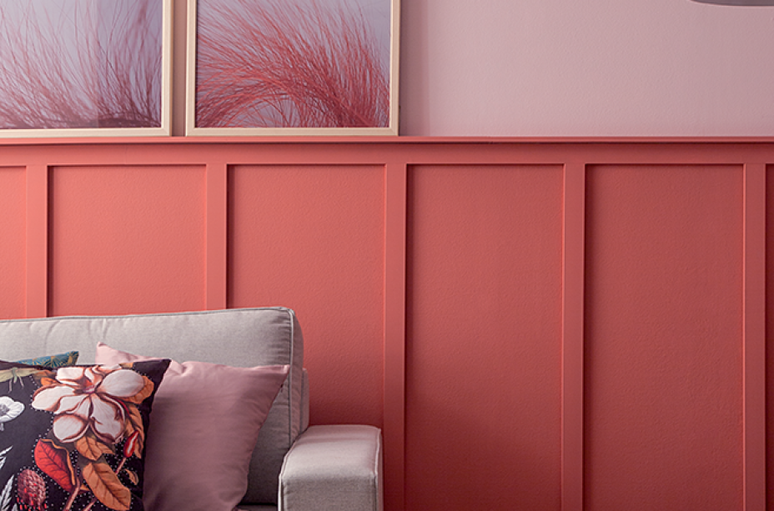
Did you like the super stylish panel, which makes a difference in the environment? Follow the instructions of the technician Alê Souza* to create an identical one

Write the necessary materials:

ºTrim 473GN | BR (2.40 x 5 cm), in recycled polystyrene, white, from the Moderna line, by Santa Luzia. Bela Ferragens, R $ 33.48 (24 fittings were used here)

º Cola Santa Luzia, in acrylic polymer, from Santa Luzia. Bela Ferragens, R $ 21, the 400g tube (we used 3 tubes)

“).”

html[data-range=”xlarge”] figure image img.img-f1df72b840b724d6cbd00cf8182820fawsqqf0wo { width: 774px; height: 511px; }HTML[data-range=”large”] figure image img.img-f1df72b840b724d6cbd00cf8182820fawsqqf0wo { width: 548px; height: 362px; }HTML[data-range=”small”] figure figure img.img-f1df72b840b724d6cbd00cf8182820fawsqqf0wo, html[data-range=”medium”] figure image img.img-f1df72b840b724d6cbd00cf8182820fawsqqf0wo { width: 564px; height: 373px; }

The last stage is gluing the top shelf.  'It is made of the same garrison, we have only reversed its position', reports Alê.  After finishing the job of applying the frames, he waits until the next day to finally paint the set as you wish.

The upper part of the boiserie is finished with the same casing used for the vertical slats, but cut according to the horizontal extension of the wall.  The harmony of the set comes from using pieces of the same width, as well as the exact intervals between them.

Follow the previous steps until all vertical lines are filled.  For a better finish, it is worth applying the same glue to each already installed piece.  After that, you need to wait at least 12 hours for complete drying.

Repeat the previous step, inserting the adjacent fitting into the marking, starting from the baseboard.  With the tape measure, check whether the distance between the frames complied with the expected measurement.  Press to correct and move on to the next collage.

Make sure the fillets are the same height (these are 1.18m) - this will ensure a perfectly aligned design.  All right, let's start the installation: apply glue to the back of the piece and fix it within the limits of your mark on the wall.  Press and hold for a few seconds to lock it.

On paper, create the project based on the width of the wall that will house the boiserie, calculating identical distances between the pieces.  Transfer the measurements to the wall, starting at the ends.  Draw the width of the profile at the top and bottom (here it is 5cm) and continue tracing until the drawing is complete.

Source: Terra

You may also like